How to Drywall a Ceiling
Drywalling a ceiling may seem like a daunting task, but with the right techniques and know-how, you can achieve professional results. At Calgary Drywallers, we specialize in providing expert drywall services to homeowners in Calgary, Alberta. In this guide, we'll walk you through the process of drywalling a ceiling and share valuable tips to ensure a smooth and successful installation.
1. Gather Your Materials:
Before you begin, make sure you have all the necessary materials and tools on hand. This includes drywall panels, screws, joint tape, joint compound (mud), a drywall saw or utility knife, a screw gun or drill, a drywall lift or assistance, and safety gear such as goggles and gloves.
2. Measure and Cut the Drywall:
Start by measuring the dimensions of your ceiling to determine how many drywall panels you'll need. Use a drywall saw or utility knife to cut the panels to size, ensuring they fit snugly against the walls and each other. For ceilings with obstructions like light fixtures or vents, measure and mark the locations on the drywall panels before cutting.
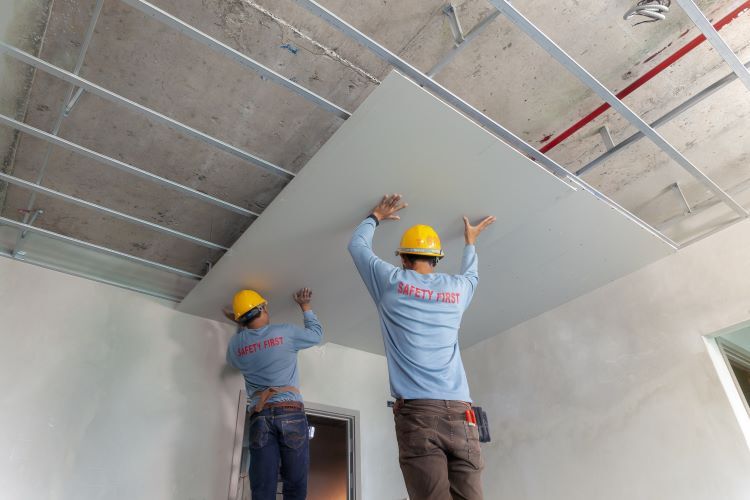
3. Install the First Panel:
Begin by installing the first drywall panel along one edge of the ceiling, with the long edge perpendicular to the ceiling joists. Use a drywall lift or assistance to hold the panel in place while you screw it into the joists, spacing the screws approximately 12 inches apart along the edges and 16 inches apart in the field.
4. Continue Installing Panels:
Once the first panel is in place, continue installing additional panels, working your way across the ceiling in rows. Stagger the panels so that the seams do not line up, which helps to strengthen the ceiling and reduce the risk of cracks. Use a drywall lift or assistance to hold the panels in place while you screw them into the joists.
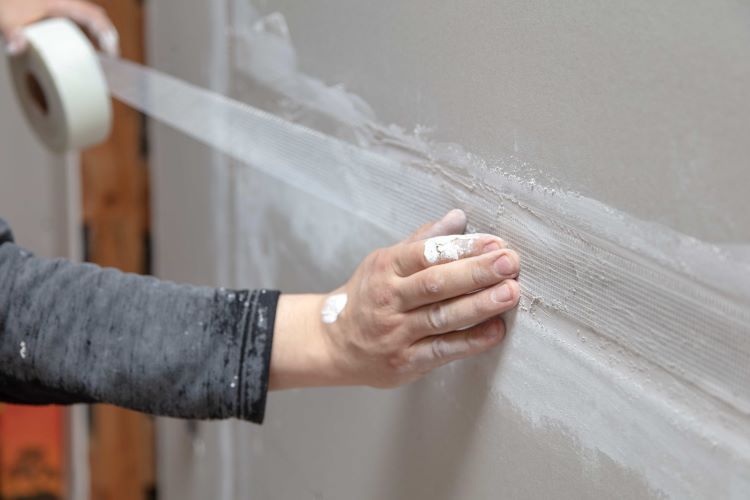
5. Tape and Mud the Joints:
Once all the drywall panels are installed, it's time to tape and mud the joints. Apply joint tape to the seams between the panels, pressing it firmly into the wet mud. Use a drywall knife to smooth out any excess mud and feather the edges. Allow the mud to dry completely before sanding and applying additional coats as needed.
6. Sand and Finish:
After the mud has dried, use sandpaper or a sanding sponge to smooth out any rough spots and create a seamless surface. Be sure to wear a dust mask to protect yourself from inhaling dust particles. Once the surface is smooth, you can prime and paint the ceiling to complete the installation.
Expert Tips:
- Use a drywall lift or enlist the help of a friend to hold the drywall panels in place while you screw them into the joists.
- Work carefully and methodically to ensure accurate measurements and precise cuts.
- Take breaks as needed to avoid fatigue and maintain focus throughout the installation process.
- Don't rush the taping and mudding process—take your time to achieve a smooth and professional finish.
By following these steps and tips, you can confidently tackle the task of drywalling a ceiling and achieve professional-quality results. If you prefer to leave the job to the experts, Calgary Drywallers is here to help. Contact us today for all your drywall installation needs in Calgary, Alberta.
You might also like